This TFO has been a favorite for me right out of the gate. I am so hungry for challenging content in STO and this really hit the spot! It has been quite a jolt for much of the community so I wanted to share what I’ve discovered, in the hope that better understanding will lead to more positive community perception. I want this type of game content to keep coming in the future!
This run included a successful completion of the very challenging optional objective of avoiding any deaths from the Apex!
NOTE: This TFO requires at least two players to perform the console activation tasks. I used a second account and set my other character to /Follow me. That is all the other character did: Follow me.
Mission Summary
- Avoid the Apex while activating 4 consoles on the first level.
- Avoid the Apex while activating 4 consoles on the second level.
- Apex boss fight.
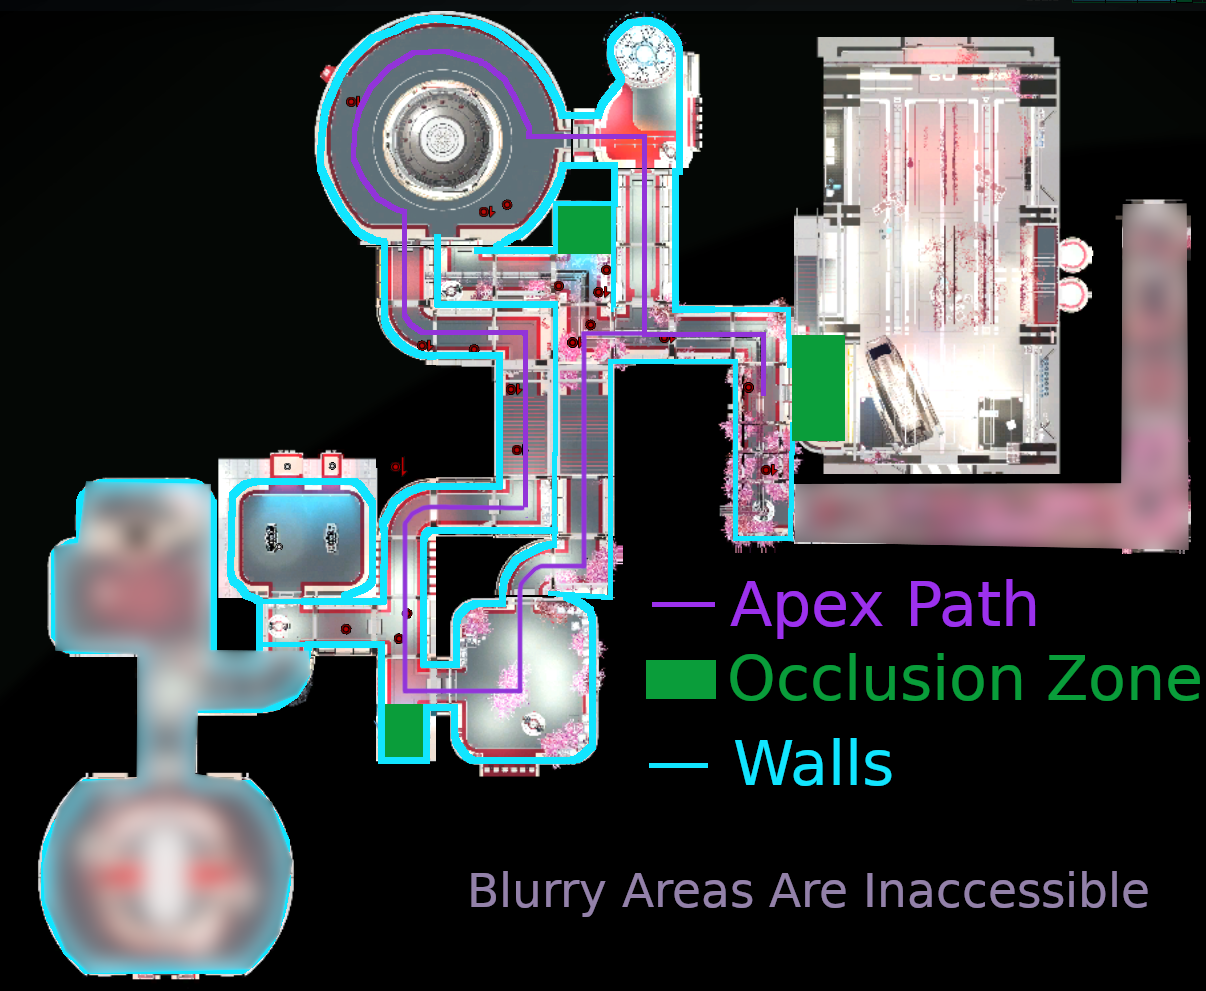
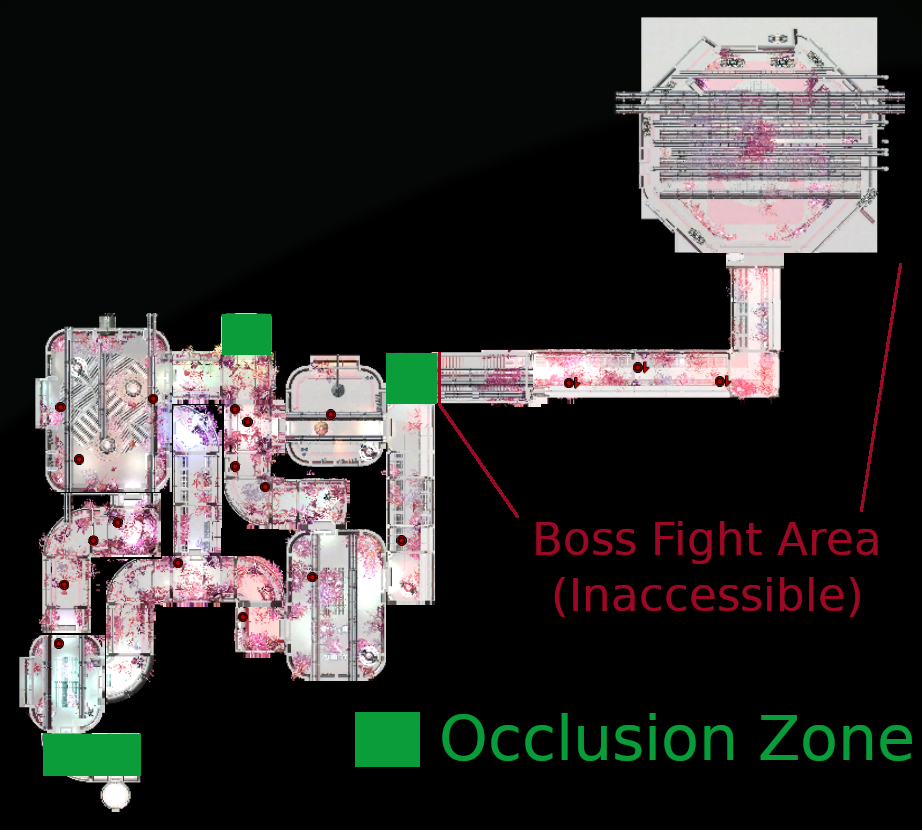
Maps
General Info
Enemies and Pustules will spawn infinitely until the boss fight. Engage them only as needed, but don’t waste time trying to kill them all. You can ignore a lot of them, or quickly take them out with AE weapons (the Agony Generator cleared the way nicely).
Pustules slow you (debuff: “Pustule Goop (Slowed)”). Shoot Pustules to prevent slows. I used Motion Accelerator to safely ignore them and help my chances of getting away from the Apex.
Borg Adaptation mechanics are in place and I recommend an Extirpating Remodulator.
Pre-Boss Fight Notes (Console Activation Tasks)
- After activating a console, the Apex runs directly towards the activated console, hunting players along the way.
- Consoles take ~7 seconds to activate.
- Consoles only require two players to be in proximity. They do not require both players to click. Use this to your advantage to let one player provide cover fire.
- Activating a console can change which doors are locked and unlocked, and can alter the Apex’s path.
- Activating the fourth and final console on either deck removes the wandering Apex from that deck and restores the minimap.
The Apex Chimeran
The Apex follows a predetermined route. This means that if you wait for it to pass once, you can follow behind it and neutralize most of its threat. The Apex’s aggro range is very short, and it won’t aggro from being shot OR from other enemies nearby being engaged. It also does not aggro just because it has line of sight, it also has to be close enough.
The Apex will gladly leave his path to chase a player that gets too close, but after losing aggro the Apex will casually walk back to where it was on its path and continue on its merry way. The Apex will lose its aggro when it kills its target or when its target ducks into an Occlusion Zone.
After activating a console, the Apex runs directly towards the activated console, hunting players along the way.
Occlusion Zones
Occlusion zones are marked by green force fields. Once you are inside, the Apex should lose intrest and walk back to its regular path. Other enemies are not bothered by the Occlusion Zone and will continue to shoot you and chase you inside. The Apex has been known to kill players who just barely make it inside, so I advise running all the way to the back wall.
In the Occlusion Zone, you are safe to wait for the Apex to do a circuit and path by again to observe its path, as it may have changed if you recently activated a console.
Traps
There are traps around the map that can be set as you pass them. These will only temporarily stun the Apex, but they can be used as an early warning system.
Tips
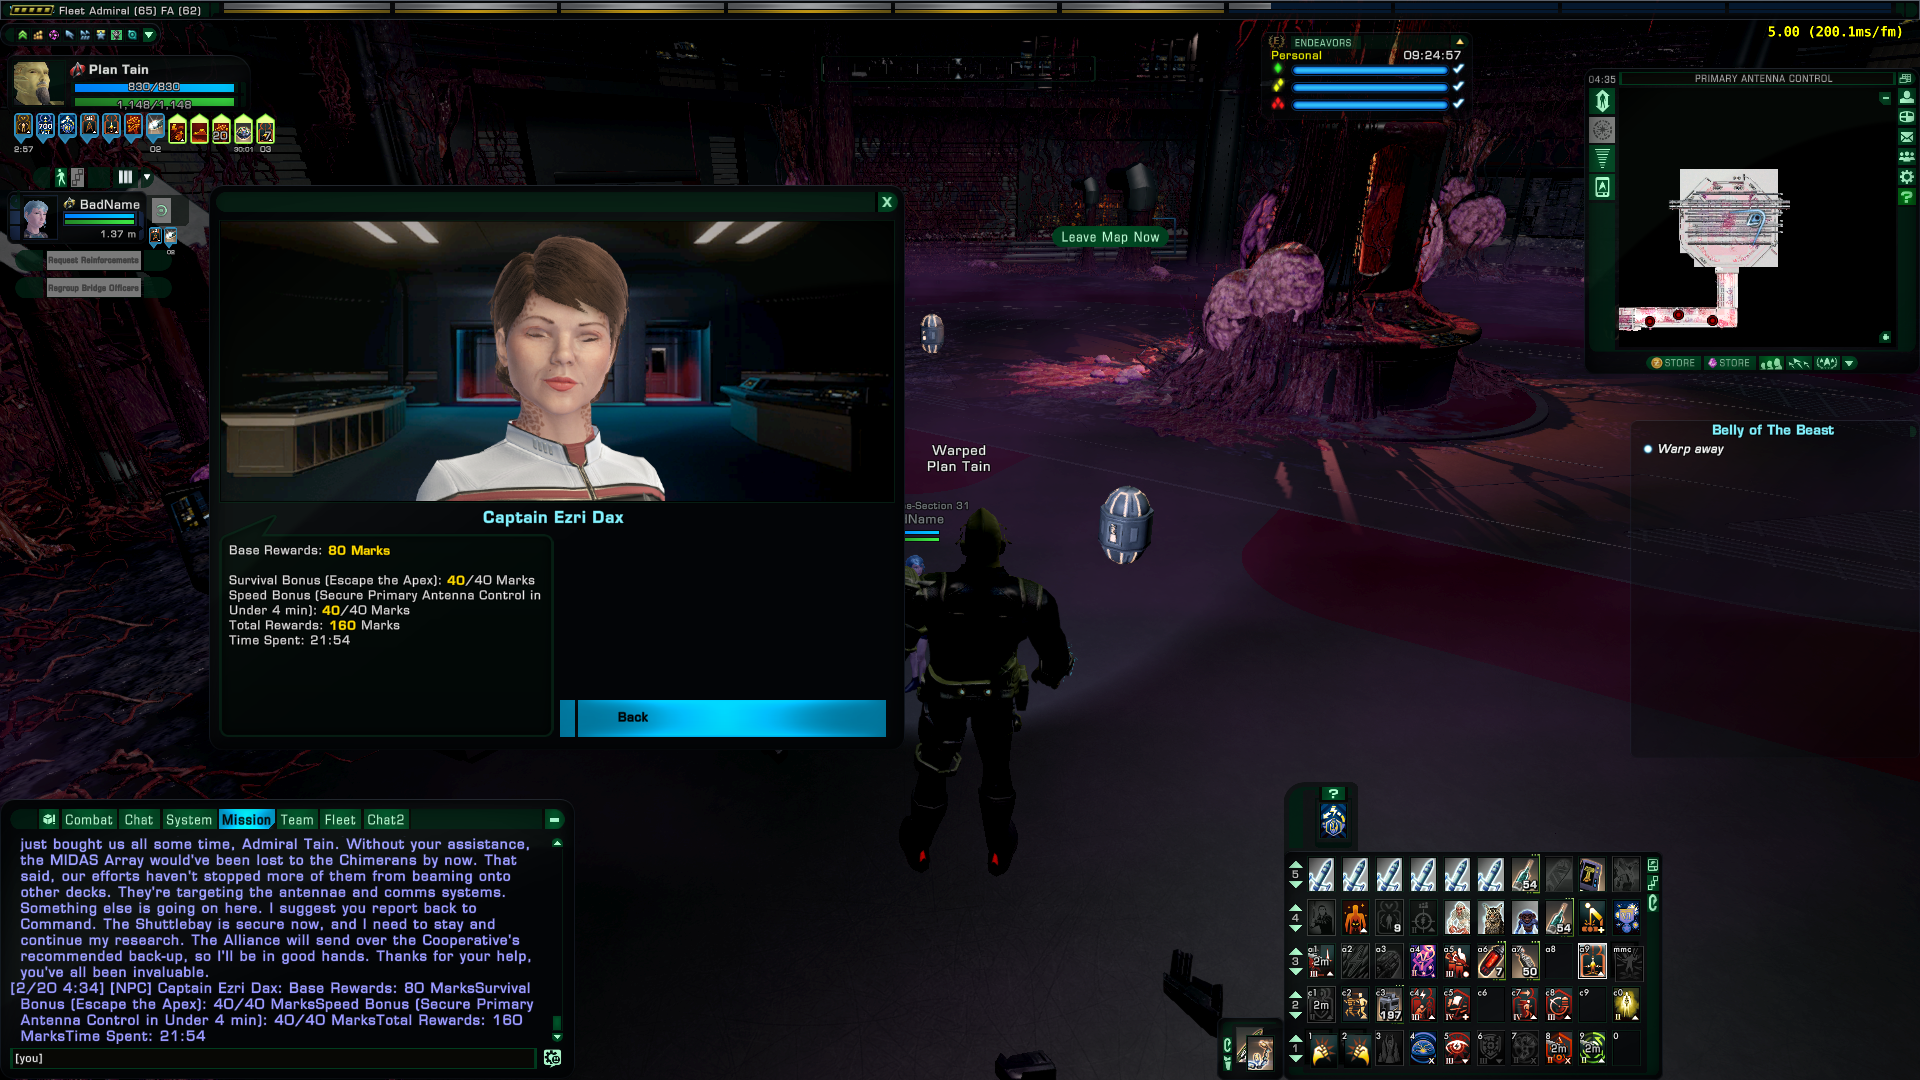
Listen to Ezri and read the tutorial (conveniently located on 3 different consoles).
Try to keep a cool head. Don’t waste time fighting the enemies, as they are just a distraction. Focus on avoiding the Apex and activating consoles, in that order. Know your Occlusion Zones, and be sure to get to an Occlusion Zone any time a console is activated to avoid the frenzied Apex that follows.
Take time to get to know the maps. His path will change as consoles are activated, especially on the second deck. But his behavior is relatively consistent and predictable and Occlusion Zones are safe spaces.
Use Mudd’s Time Device, which saves you from a death blow. Think about where you activate Mudd’s, since you will be ported back to your activation spot when you take that death blow.
Since the Apex frenzies and homes in on activated consoles, know where your next Occlusion Zone is before you activate the console. Activate it, then immediately get to the Occlusion Zone and then wait until the Apex reaches the console and resets its frenzied state. Once it reaches the console, the Apex will return to normal speed and walk back to where it left its path and then resumes its course. Consider waiting until it passes by the Occlusion Zone again at its normal pace (not running) to be sure its safe.
Consider that running as a group might be the safest way to avoid Apex deaths. If you are split up, it is almost guaranteed that the Apex will run into one group or the other whenever a console is activated.
Consider that it might be even better to send two players out to activate the consoles, while everybody else stays back at the start.
Remember to at least run in pairs: you can’t activate a console by yourself.
If you are running this in random pick-up groups, expect lots of deaths. But also, don’t be so bothered by death!
I LOVE the Apex mechanic. Since it’s unkillable I think of it as a roaming hazard rather than an enemy.
Boss Fight
This is a pretty straight forward fight: pew pew pew.
The first stage involves waves of enemies and fighting the boss until it becomes shielded.
It will be shielded for about a minute, during which you will encounter 3 more waves of enemies:
20:34 Shield goes up, boss deactivates. First wave spawns.
20:38 Second wave spawns.
21:10 Third Wave Spawns.
21:42 Apex shield drops, boss reactivates.
Apex was shielded for 1min8sec on this run, with 32 seconds between the 2nd and 3rd waves, and 32 seconds between the 3rd wave and the shield dropping.
Don’t shoot Apex when shielded, it may cause ground hazards.
Video Notes
Sorry for the low quality. I was running two accounts on my 6-year-old laptop!
Please ignore the 5 minutes of wasted time before the final console. I was waiting for the Apex, but apparently it no longer pathed through that spot (probably from a door locking after the previous console was activated).
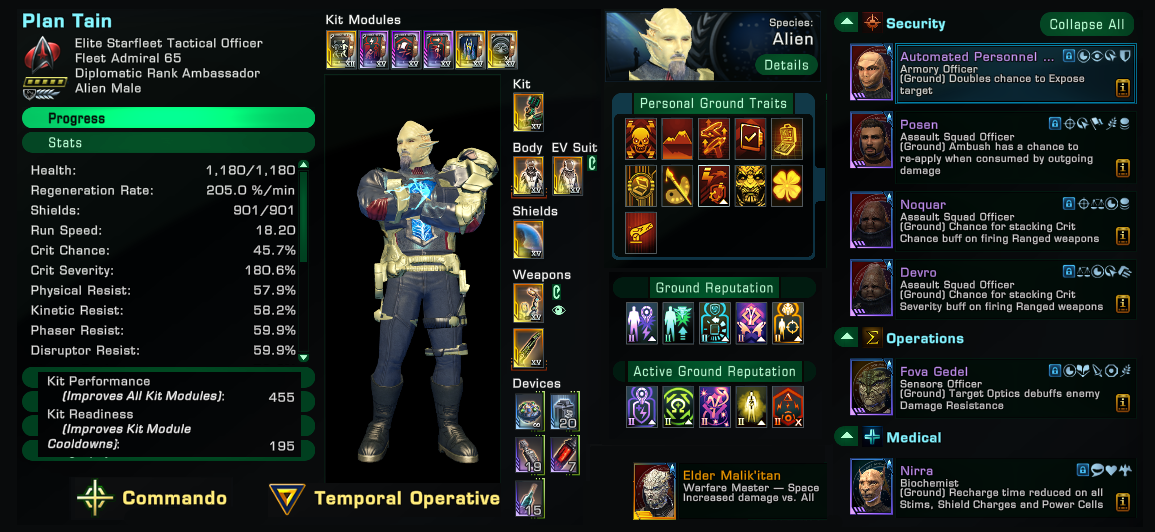
Kits:
- Mudd’s Time Device
- Ambush
- Rally Cry
- Motion Accelerator
- Rapid Lithic Formation
- Agony Generator